Introduction
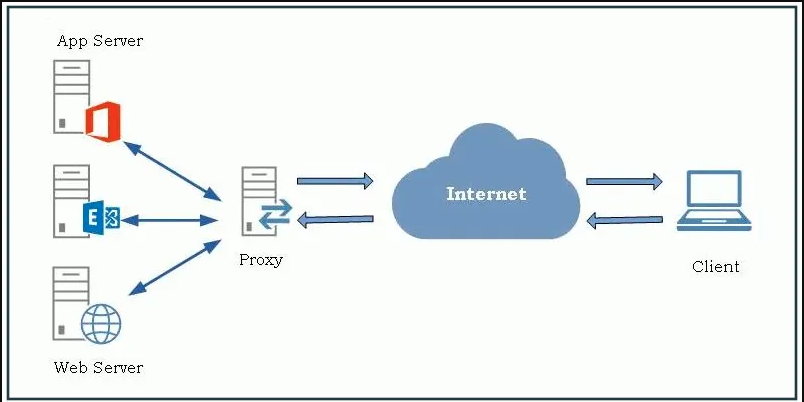
Reverse proxy provides an additional level of abstraction and control to ensure the smooth flow of network traffic between clients and servers.
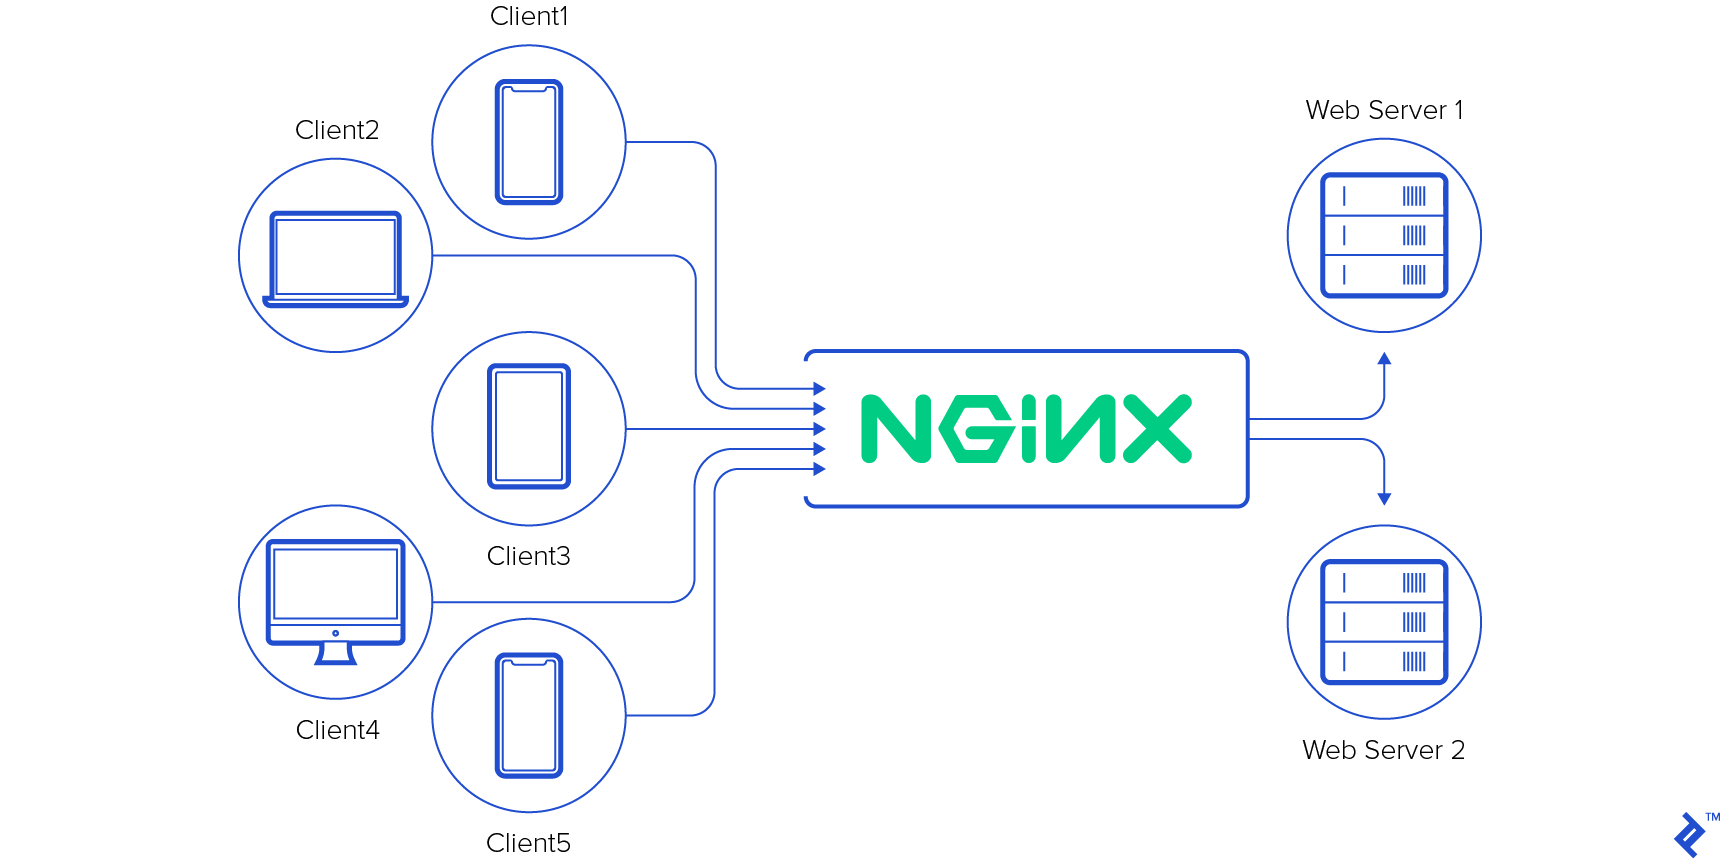
Reverse proxy server can act as a “traffic cop,” sitting in front of your backend servers and distributing client requests across a group of servers.
Reverse proxy protects web servers from attacks and can provide performance. It's helps in hiding the server or service from direct expose to internet.

It's well known SAAS, most of the company and service providers use it as reverse proxy.
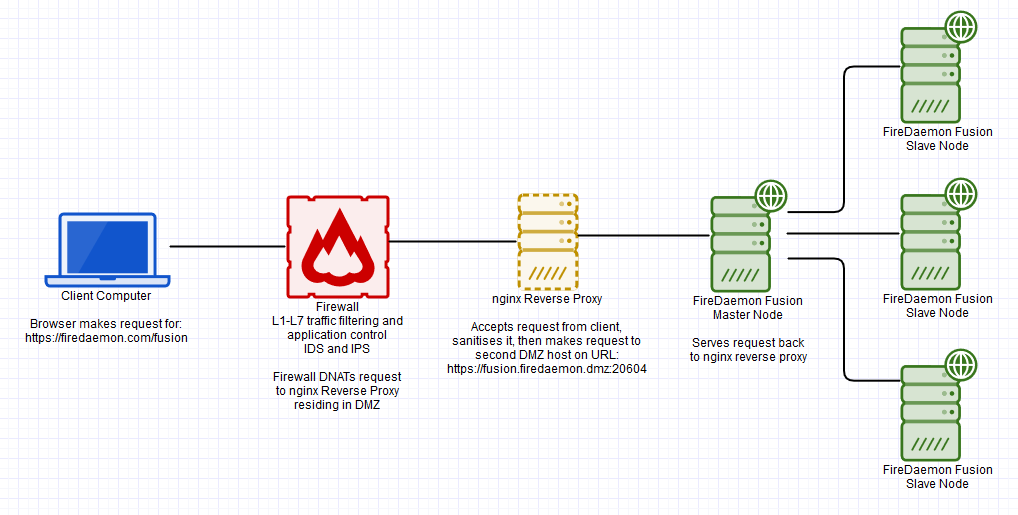
How It works
More detail image below:
Consider a couple of services running on a machine / server on specific port, it will be accessible by the remote_ip + port like
192.168.1.2:5000 // running node server for myapp
192.168.1.2: 8080 // running apache for myapp2
192.168.1.2: 9000 // running another apache for myapp3
So it's quite difficult to remember the ports and putting like this as URL. For our better we always follow protocols like http or https or ftp.
And directly giving the url which takes me to the port 80 by default or to 443 in https / port 21 in ftp like wise.
It will be easy if these would be like this, and will be easy to access by simple URLs.
192.168.1.2/myapp
192.168.1.2/myapp2
192.168.1.2/myapp3

Here we need a proxy server / reverse proxy to work around, so that our internal ports remain private from the internet.
Approach to do
ou should have the administrator privilege of the system to make it install and configure the nginx.
Get the nginx from the official site and follow the install steps:
For the Linux users you may install via command line depending by your Linux dest, likeDebian Users:
sudo apt install nginx
Once you installed the nginx, you need to locate the nginx.config file on your server. Most probably in Linux system it would be in /etc/nginx/ folder.
Open the nginx.conf file in your favourite editor, mine is vim 🦹♂️ and search for the server{} block in it.
If the file do not have such server{} block, you need to check in sites-available, may be it will be like default
List out the listening ports, by default it listen on 80(http) and 443(https). It's depends on you how you are going to use it. you may use 80 for http and 443 for secure connection which will require SSL certificate.
Here the main focus is location & proxy_pass and it's magics.proxy_pass:
The ngx_http_proxy_module module allows passing requests to another server. Sets the protocol and address of a proxied server and an optional URI to which a location should be mapped. As a protocol, “http” or “https” can be specified. The address can be specified as a domain name or IP address, and an optional port:
proxy_pass http://192.168.1.2:5000/uri/;
If a domain name resolves to several addresses, all of them will be used in a round-robin fashion. In addition, an address can be specified as a server group.
Parameter value can contain variables. In this case, if an address is specified as a domain name, the name is searched among the described server groups, and, if not found, is determined using a resolver.
A request URI is passed to the server as follows:
- If the proxy_pass directive is specified with a URI, then when a request is passed to the server, the part of a normalized request URI matching the location is replaced by a URI specified in the directive:
location /name/ {
    proxy_pass http://192.168.1.2/remote/;
}
If proxy_pass is specified without a URI, the request URI is passed to the server in the same form as sent by a client when the original request is processed, or the full normalized request URI is passed when processing the changed URI:
location /some/path/ {
   proxy_pass http://192.168.1.2
}
Location:
Each of the server instance run by nginx, need a location to server the content from there. Other wise it will serve from /lib/shared/nginx by default.
Code snap of Configuration:
# nginx reverse proxy virtual server setup for FireDaemon Fusion 6.0.19 or later
# Adjust hostnames, ports, paths and other configuration parameters as you see fit
#
# You would access Fusion via reverse proxy by pointing your browser at
# https://192.168.1.2/myapp
#https://192.168.1.2/myapp2
#https://192.168.1.2/myapp3

server {
    server_name *myapp.server;
    # This SSL config should give you an A or A+ on Qualys SSL Server Test
    # https://www.ssllabs.com/ssltest/
    listen 443 ssl http2 default_server;
    listen [::]:443 ssl http2 ipv6only=on;
    # Mitigate BREACH vulnerability and CRIME attack
    gzip off;

    # Cert generated via https://www.zerossl.com
    # Remember chained key is server key followed by intermediate and root
    ssl_certificate               /etc/nginx/ssl/myapp_server_chained.crt;
    ssl_certificate_key           /etc/nginx/ssl/myapp_server.key;
    ssl_protocols                 TLSv1.2 TLSv1.3;
    ssl_prefer_server_ciphers     on;
    ssl_session_cache             shared:SSL:10m;
    ssl_session_timeout           10 ssl_session_tickets           off;

    # nginx will use the default DHE parameters provided by OpeSSL
    # This forces nginx to use a 4096-bit key
    # Generated with openssl dhparam -out dhparam.pem 4096
    # Generates a safe probable prime that passes the Muller-Rabin test
    # Assists in mitigating Logjam. Not relevant if ECDH ciphers are used exclusively
    ssl_dhparam                   /etc/nginx/ssl/dhparam.pem;
    ssl_ciphers                  "EECDH+AESGCM:EDH+AESGCM:AES256+EECDH:AES256+EDH";

    # Enable OSCP Stapling
    ssl_stapling                  on;
    ssl_stapling_verify           on;
    ssl_trusted_certificate       /etc/nginx/ssl/myapp_server_chained.crt;
    resolver                      8.8.8.8 8.8.4.4 valid=300s;

    location /myapp/ {
        proxy_pass    http://192.168.1.2:5000
      }
    location /myapp2/ {
       proxy_pass   http://2.168.1.2:8080
    }
    location /myapp3/ {
       proxy_pass   http://2.168.1.2:9000
    }
}
# Redirect to HTTPS
server {
    server_name *myapp.server;
    listen 80 default_server;
    listen [::]:80;
    access_log off;
    error_log off;
    return 301 https://$server_name$request_uri;
}
Now the above configuration will listen the default port as 80, which will redirect the user request to 443.
And the 443 server is ready to serve the contents from the internal nodes (from different ports of the applications ), for each application running on different ports.
Leveraging Nginx as a Proxy and Reverse Proxy: Complete Guide